Blog Post Wheel Work

Artist Develop Art Making Skills:

What new techniques or processes have you learned? How did you apply it to you work?

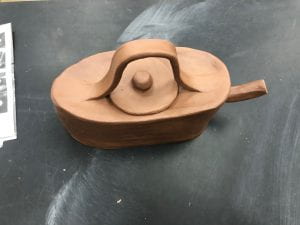
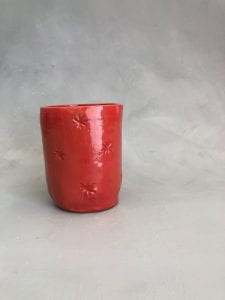
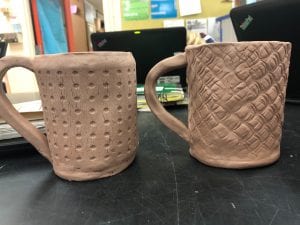
-When working on the wheel I learned how to properly place my hands to create even walls and a thin base. I also learned to round off the bottom with the wooden angled tool. I applied this to make a symmetrical bowl with even walls and a rounded base.

How did you increase your skill with familiar materials or techniques?

-I increased my skill by watching videos and trying out the techniques they had. I also had acrylic nails on that made the process even more difficult. I tried my own techniques to get around this obstacle and it worked out to my advantage. in place of my fingers a lot of the tie I would use the sponge and the sides of my palms as well and my knuckles.

Artist Reflect:

When did you step back and analyze your work during this project? What was the result?

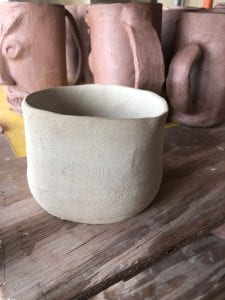
-I stepped back and analyzed after the first week on the wheel. After spending the weekend watching videos and looking back on my own mistakes, I took it upon myself to really focus and put in effort, unlike the first week. This is when I ended up with my two successes.

If you could create this artwork again from the beginning, how would it be different?

-I would try to make one of the bowls wider and one of the bowls taller, just to have variety in each.

Blog Post Glazed Tea Set

Artists Take Risks:

What did you try that you weren’t sure about as part of this project?

-When creating this tea pot, I was least sure about the slab building. When bending the sides to be more oval like I was worried about cracking. I was also concerned about the slabs being too wet and caving in on each side causing it to be wonky.  As well as, the handle falling off from being too heavy, but in the end support beams made of clay helped a lot.

What did you learn from selecting a material or technique that was new or different over something that was familiar?

-I learned that I should take risks in the art I’m making and create something practical and useful even if its out of my comfort zone. It really taught me a new way to look at things.

Artists Have a Global Awareness of Art Making:

How did you find inspiration from another artist or culture?

-My piece is based off of the famous painter Bob Ross. For my saucers, they are paint pallets and for thy cups they have “happy little trees” on them, which is something Bob Ross is known for catch phrasing. For my overall tea pot, I am painting two different scenes on both sides to emphasize the canvas idea and bring his work to life on something used in everyday life.

How did you use tools and ideas from another content area in your art work?

-By bringing his painting into play on each side of my tea pot. It will not be the same as his, but the inspiration is there.

Did you research and make connections to another artist?

-Yes, it is all inspired by my favorite painter, the sweetest soul Bob Ross.

blog post #5

Artists Develop Art Making Skills:

  1. What new techniques or processes have you learned? How did you apply it to your work?                                                                                                                                 – When working on our Liz Zlot Summerfield slab building projects, we learned how to construct slabs into pots without having the issue of cracking, support, etc. I will now apply this slab building into new works by using similar techniques.
  2. How did you increase your skill with familiar materials or techniques?                    -I increased my skill with familiar materials or techniques by learning over and over with practice on how to achieve them. Over time I have succeeded on creating my ideal pot.

Artists Take Risks:

  1. What did you try that you weren’t sure about as part of this project?                         – For this project I tried a new technique while embellishing. I found this new art style that I doodle on paper a lot and I wasn’t exactly sure how it would turn out on a pot. However, I took my chances and it came out pretty good! Also while glazing I usually do one solid color with a few coats and for this one I didn’t. I chose to do a few layers of white glaze as a base and I mixed a clear glaze with the grey glaze and created a some what translucent color to put over top. It then went into the ridges of the embellishment and created something cool.
  2. What did you learn from selecting a material or technique that was new or different over something that was familiar?                                                                      -I learned that i should take chances even if i do not know how it is going to turn out. In the end i would have tried and either succeeded or learned from the mistake


blog post #3

Artists use materials and tools in an appropriate and safe way

  1. While creating my ceramic artworks I used tools such as loop tools of all sizes, the needle tool, a pencil, the fettling knife, etc. I maintained this while working on my sgraffito mug.
  2. In our pottery room, we store the fettling knifes and needle tools in a specific are so they are not lost or taken. We also keep all of our other tools in bins in a cabinet to ensure they will be there the next day and save them from being damaged. This maintains their good condition.
  3. Some procedures we have learned and practiced while using partially hazardous materials/ equipment include checking out the materials to make sure they do not leave the classroom, during use we make sure we are careful with the tools, and when using bone dry clay we make sure we do not create a whole lot of dust so we do not inhale it, protecting our lungs.

Artists Reflect

  1. When I stepped back to analyze my work, I was excited to see my sgraffito work was how I imagined however the bottom of my mug, did not turn out the way I liked. This is because of my own mistake, I blanked and accidently thought the slip couldn’t go on the bottom, however, that is the glaze.
  2. If I could redo this artwork, I would add slip on the feet of the much and make sure all spots are covered by the underglaze.

blog post #2

How does the craftmanship of an artwork affect its meaning to the viewer?

  • The craftmanship of an artwork affects its meaning because if it is well crafted, you can tell based on shape and overall wellness, if someone puts effort into a piece or not. Shape of the artwork could show a persons personality, and show someone their preferences.

What did you learn through the experience of soft slab tripod building? How were you successful? What would you do differently?

  • Through the experience of soft slab tripod building, I learned that the soft clay can be hard to manage when trying to achieve the shape. If it is too thin it would come apart and too think there is too much clay to work with. I was successful in creating the lip and the overall spherical shape of a mug. I struggled on creating the tripod feet. At first, I pinched them together and that was not correct, so i restarted and achieved the feet.

What did you learn through the experience of doing sgraffito on the mug? How were you successful? What would you do differently.

  • Through the experience of doing sqraffito, I learned that in order to make the mug look adequate, you cannot press too deep when you carve into the clay. You need to start simple and have your more prominent lines be bold. I was successful while doing this when I made the mountains and the trees lying in front. I struggled while creating grass to look realistic, If I could do anything differently I would have made it look more nature like instead of just lines on the bottom.

What role does persistence play in revising, refining, and developing an artwork?

  • Persistence plays a huge role into revising, refining, and ddevleoping an artwork because if you do not have it, you tend to not care as much about the piece and you have less and less effort moving on.

blog post#1

Observation:

I measured my Trompe L’oeil of a polaroid camera to be about a half an inch larger due to the shrinking in the kiln. So it is a bit larger than the original object but in the end it will even out.

The areas I paid the most attention to was the intricate carvings and the overall shape. A polaroid camera has many curves and add ons that I had to perfect and the small details I had to carve.

Develop Craft:

The tools and techniques I used to recreate my object consisted of the needle tools, serrated edge scraper, small and large loop tools and the rubber rib to smooth it all out. I created the camera with a soft slab and scored it to become phased together. I also made it hollow so it was easier to achieve and it would not have any problems in the kiln.

First, I made a slab and measured it out to meet with configurations I previously planned out. Then, I rounded it and added curves with rolled coils, and I also added the actual lens by doing this technique. I had to make sure the lens did not over power the rest of the camera. I then let it dry until it was leather hard and added the small details and carvings.

Problem Solving:

Some challenges I faced while I was making the camera was when I made it hollow. It unfortunately started to cave in at some areas. I ended up opening it up by added a slip at the top and lightly pushing it back to it original shape, this worked out because the camera normally has an area where the picture wou;ld come out.

Another problem I had to solve was when I was carving in the words, little balls of clay would get lodged into the words and become stuck. I had to individually take a needle tool and carve them out.

portfolio

The first piece we tried to make were pinch pots. They were simple and to the point and we were allowed to do whatever we wanted to embellishment even before we learned the logistics. From this we learned to develop and observe how others also completed the craft.


The next thing we learned was coiled bowls. We learned the importance of smoothing and connecting coils and the role they play in the structure. Now that I reflect back I can see I wasn’t as original as I wish I was and that I could have put more effort into it. However this project did help me stretch and explore new artistic tendencies. I embellished with a loop tool when it was leather hard but I do wish I took my time.


When we created the soap dish, we were learning to slab build for the first time. Now that I look back this, is the project that I would completely restart. I did not smooth very well and there was little to no effort. I wish that I could have embellished more and made the whale look more appealing. There was not enough coats of glaze and overall I believe it is my worst one.


The second to the last project we created was the slab mugs. I really enjoy my embellishments i made with loop tools and the mermaid rolling pin. I made it so my mug looked like a pineapple and a strawberry. The only mistake i made was not fully connecting the handle to the red mug. I believe i developed since the pinch pot and observed others to help me create my craft.

Lastly, our final project, this by far is my favorite. I connected all the flowers very well and the seams of my project are all smoothed and it came out of the kiln perfect. I do believe that i came a long way from the pinch pots to now.

blog post #11

The tips in Amaco’s videos include:

1. Clean with a sponge to get all crumbs off, but do not rinse or the ware will absorb.

2. Use a natural fiber brush for long fluid coats.

3. Mix your glaze

4. Use a rubber band, tape, or wax to keep the foot clean, keep track of coats and wait until dry to remove.

5. Write glaze info. on an index card and take a photo of it.

The tips I’ve used while glazing include #’s 1-4, I usually do not use tip #5. From now on I will try step number five in order to keep track of my glazing. I believe if I use all 5 my glazing will improve and I will make a better piece.

My glaze choices and processes have all been really similar, I usually choose colors such as red, yellow, grey or blue. I have only used the semi see thru glaze twice and a textured on once. I use 2-3 coats each time and clean the bottom. On my mugs I used Ruby, Emerald and Peridot. On my first mug I painted an emerald stripe at the bottom and at the top I added peridot. On the ruby one I just added 3 solid coats.

blog post #10

Compare and Contrast: Both of my bone dry mugs are the same proportions and the handles are both the same size and will be able to support the mug when it is full. On my second mug the handle is more appealing, on the first one it is a little wonky and boring. Both of the designs kind of smoothed away when I connected the handles and got the cracks smoothed. The seams are connected and there are no visible holes where liquid will get through.

Problems: Some problems I faced when rolling out my slab included unevenness, distorted designs, cracks, and more. I tried to smooth it the best I could but the designs started to fade away. The lip and bottom are a bit rocky as well as the overall mug. I have learned from these mistake and will strive to do better on mug #3.

Texture: The tools and techniques I used to make the texture was simply by a rolling pin. On my next mug I plan to execute it better but to make these better I will add a textured glaze such as the matte one. Thee development of the texture shows that each time I do it I get better. which shows my advancement.

blog post #8

The first I chose was a Terracotta Amphora from the 6th century B.C. It is about 9-10 inches high and is not attributed to anyone. In the Archaic period, it was used to store wine and oil. On the front of the vase there is a small flower/leave embellishment, there are three stems and three leaves. It is the black clay embellishment used in the firing stage. The black figure is not very large, nor small. It has two handles for carrying.

Terracotta amphora (jar), Terracotta, East Greek

The second vessel I researched was a Terracotta Hydria (Water Jar) from the Archaic period of 510-500 B.C. It is the height of 14 and 3/4 inches. It is attributed to the class of Hamburg. It is used to receive water or to fill/ store water. The embellishment on it has stripes and zig zags as well as water droplets. On the jug in black are the story of some people getting water and asking permission to go to the fountain. It is a black figure vessel.

Terracotta hydria (water jar), Attributed to the Class of Hamburg 1917.477, Terracotta, Greek, Attic

It is important for museums to hold these vessels because it preserves the memory and history of ancient Greece. In my second example, it shows people asking permission to fill up water jugs and them gathering water from a fountain. These black figures give us a glimpse into the life back in the age. The Met holds thousands of vessels for this very reason and has it open to the public so people can experience it for themselves.